Introduction:
Congratulations on your new ring and pinion gear set! Whether you've upgraded for enhanced performance or replaced worn components, properly breaking in your ring and pinion is essential for maximizing longevity and ensuring optimal performance. In this guide, we'll outline the importance of a break-in procedure and provide step-by-step instructions to help you achieve a successful break-in process.
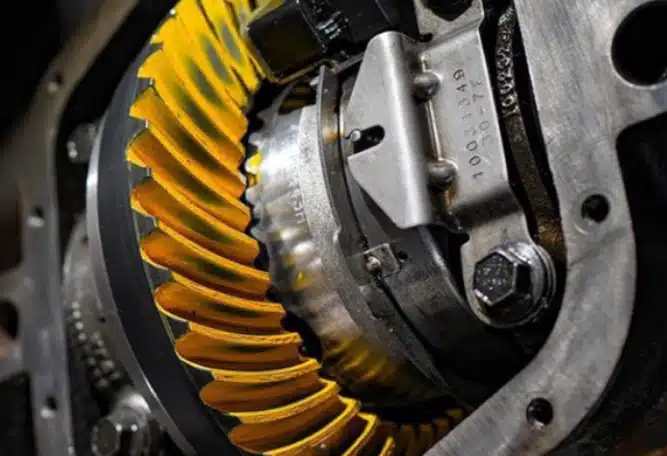
Why Break-In Your Ring and Pinion?
Ring and pinion gear break-in allows the mating surfaces to properly mesh and wear together over time. This critical process helps prevent premature wear, overheating, and potential damage to the gears, ultimately prolonging their lifespan and maintaining performance.
Ring and Pinion Break-In Procedure: Step-by-Step Guide
1. Initial Inspection: Before beginning the break-in process, inspect your ring and pinion gears for any visible defects or damage. Ensure proper installation and alignment, and address any issues before proceeding.
2. Initial Drive: Start with a gentle initial drive, avoiding aggressive acceleration, high speeds, or heavy loads. Gradually build up speed and vary your driving conditions to promote even wear and bedding-in of the gears.
3. Heat Cycling: Perform several cycles of heating and cooling to facilitate proper seating of the gears. Drive for approximately 15-20 minutes, then allow the differential to cool down completely before resuming driving.
4. Vary Speed and Load: Throughout the break-in period, vary your driving speed and load to promote uniform wear across the gear surfaces. Avoid prolonged periods of constant speed or heavy towing, This can lead to localized overheating and uneven wear. It is important that you do not exceed 55-60 MPH for the first 100 miles and preferably the first 500 miles. Driving on a new ring and pinion before the initial 500 mile oil change should be under normal driving conditions. No hard starts, racing, off-roading, towing, and should not be flat towed. Local driving is really important during break-in. Do not expect to get new gears installed and then drive across the country or do any off-roading. You will "smoke" 'them.
5. Fluid Change: After completing the 500 mile break-in period, perform a fluid change to remove any metal shavings or debris generated during the bedding-in process. Use a high-quality gear oil recommended by the manufacturer for optimal lubrication and protection.
6. Post-Break-In Inspection: Once the break-in process is complete, perform a thorough inspection of your ring and pinion gears to ensure proper wear patterns and alignment. Check for any signs of abnormal wear, noise, or vibration.
Quick note: If you have REV Outfitters perform the install, you don't have to worry about steps 1, 2, 3, 5, and 6. All you have to worry about is step 4 and getting the vehicle back to us for an inspection and fluid change.
Conclusion:
Properly breaking in your ring and pinion gears is essential for maximizing their lifespan and performance. By following this step-by-step guide and driving appropriately during the break-in period, you can ensure smooth operation and longevity. So, take your time, be patient, and enjoy the benefits of a properly bedded-in ring and pinion gear set for years to come.
